BUDGETING
This document assumes that Tubes has been set up for your organization, that you have a user account, and that you have access rights to the project “Training Project”, which is currently in the budgeting phase.
This training also assumes that the Sales module is disabled and that the system is used exclusively with budget prices.
Create a Budget with Tubes
To open the Training Project, follow these steps:
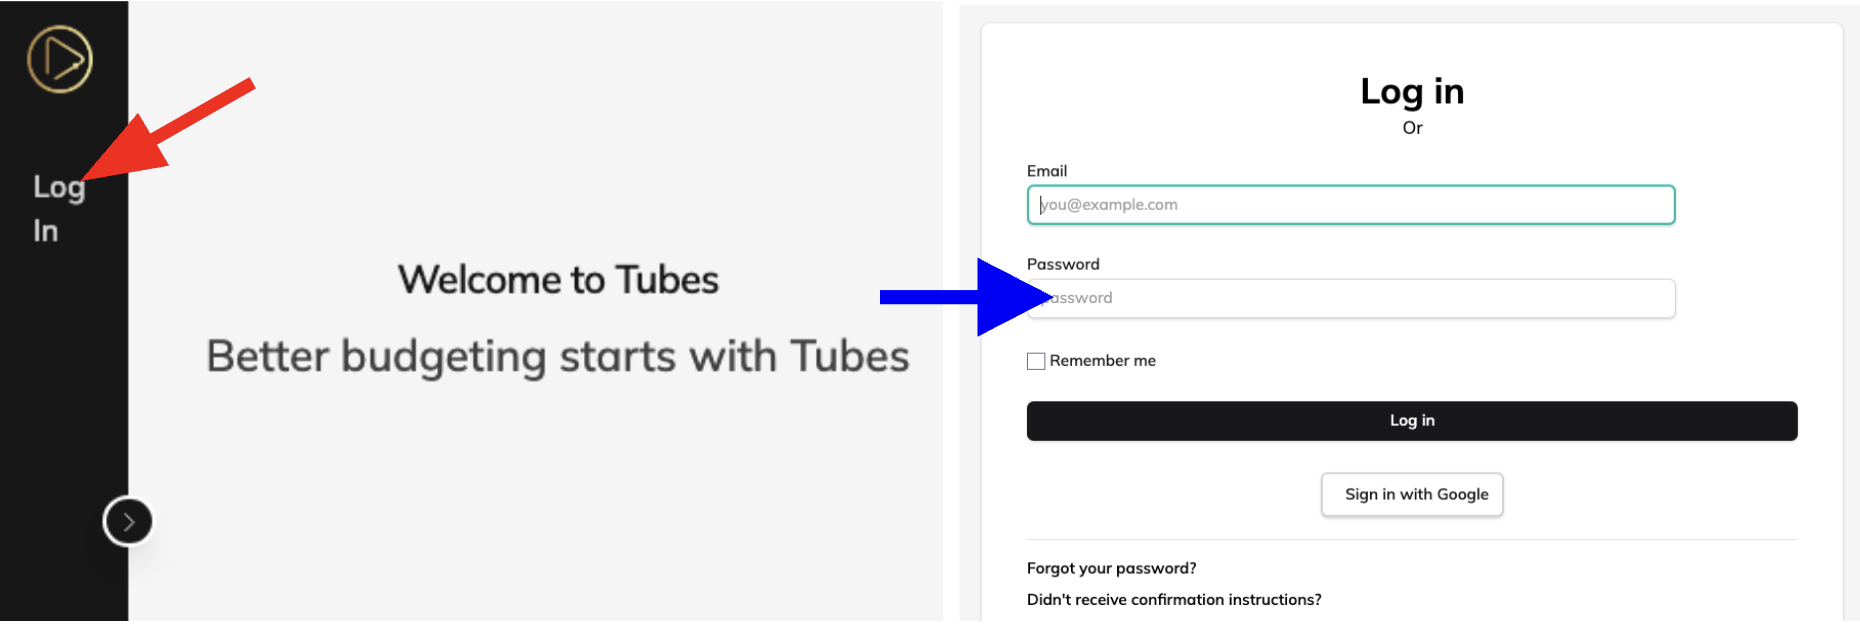
1. Open the left context menu (if closed) by clicking the arrow (center left), so you have a clearer overview of the available navigation options.
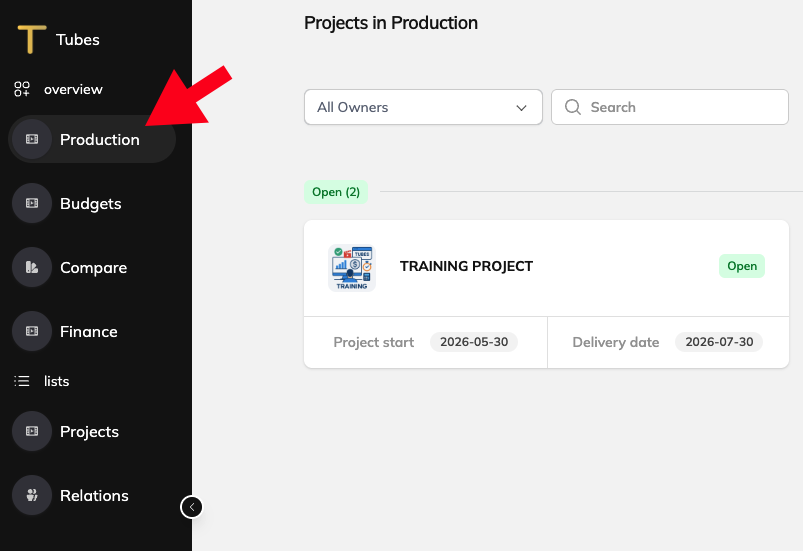
2. Click “Production” in the left menu
3. Locate “Training Project” and click on the project card to open the project.
If needed, you can filter the project list by typing “training” in the search field at the top left.
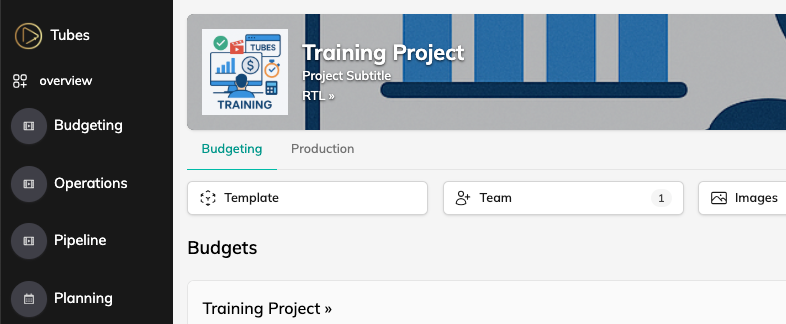
You are now in the project and may already see budgets that have been created.
4. Go to Tab Budgeting and check the Team settings to see who has access to this project.
Depending on your user permissions, you may also have access to all projects.
5. Click “Training Project” in the top-left corner to return to the project overview.

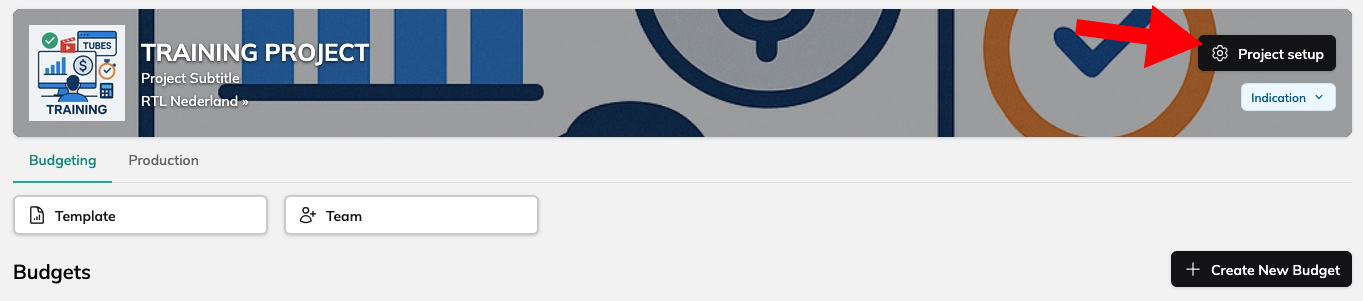
Project details
Update the project details.
Here you can change the project name and enter or update other relevant project information, such as the client, start date, delivery date, and the number of shooting days.
6. Open “project setup Click” and check the settings. Try to change some settings.
7. Click “Training Project” in the top-left corner to return to the project overview.
Create a new budget.
From the project overview, create a new budget.
Project data is copied into the new budget. Review the information carefully.
If necessary, complete or adjust the details and change the budget name, for example by adding your first name.
8. click “Create New Budget”. And if you have not yet entered the number of shooting days in the project settings, enter for example 5.

Build the budget
The budget has been added to the project. You can now start building up your budget.
9. Click the “Build” button next to the budget you just created.
You now can setup the budget in the following three steps:
Plan – select a template and define the structure
Budget – build the budget and add notes and actions
Additional – add overhead, discounts, and other additional costs

Build the budget | Plan
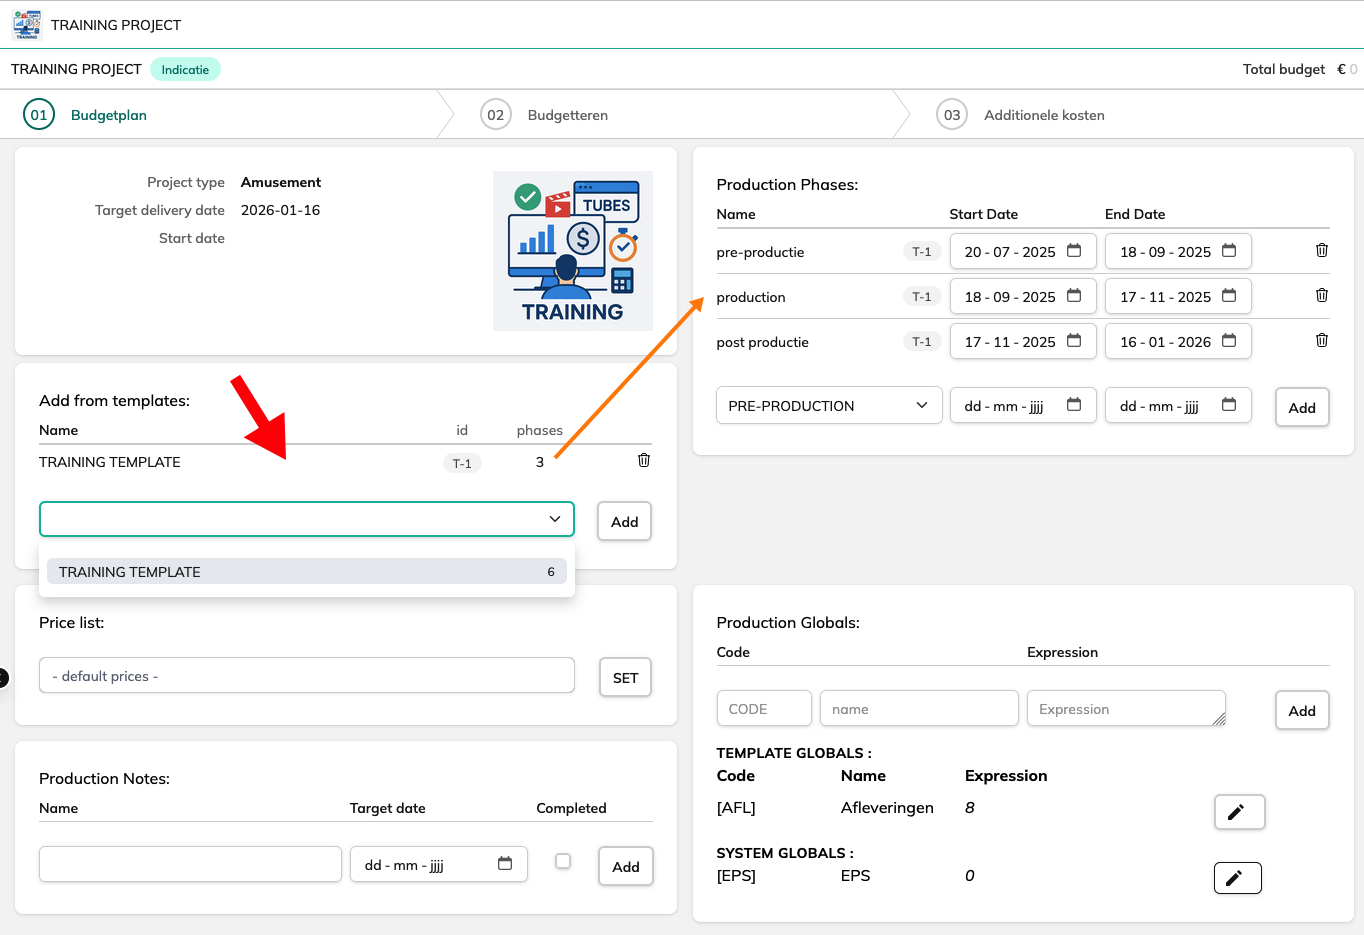
In the first step, you can set the template, price list, and globals that will be used to build the budget further.
10. In the first step, make sure the “Training Template” is linked to the budget in card “Add from templates”.
⚠️ Once the template has been added, you will see the production phases and production globals
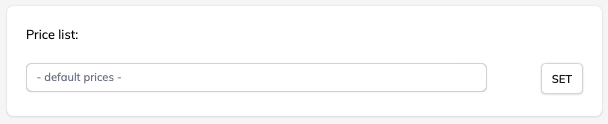
In the Budget Plan, you can also select the price list that will be used for the budget.
This selection overrides the price list that is set in the “Training Template”.
11. Check whether a price list is available and select the desired one.
Build the budget
You can navigate using the steps displayed at the top of the screen.
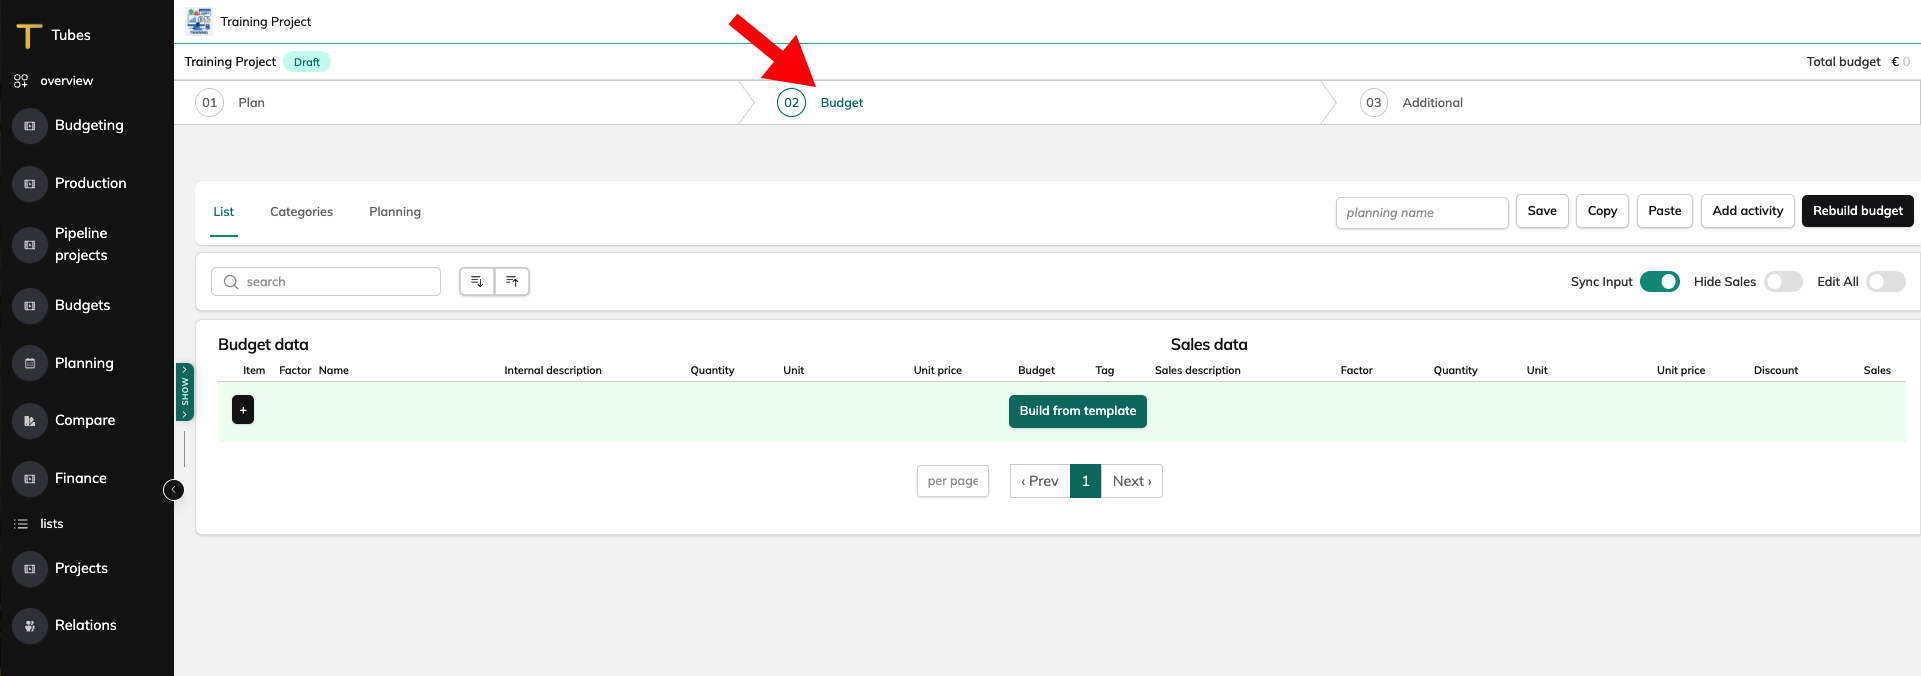
12. Go to the “Budget” step.
You will now see the “Budget” screen.
Next, explore the budget side menu to understand the main budget sections:
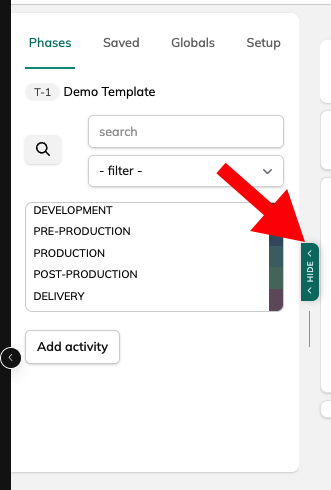
13. You can open a menu on the left side of the budget. In this menu, you will see Phases, Saved, Globals, and Setup.
If you open them one by one, you will see:
The phases from the selected template.
The saved versions of the budget. Under the “Saved” tab, you will find all saved versions of the budget.
When no budget has been created yet, this list will still be empty.
You can reopen previous versions or delete older saved versions.The project and system globals. Under the “Globals” tab, you can manage the globals.
Basic project settings and budget options, such as episodes, duration per episode, and shooting days. You can also use the update function to refresh the screen, or create a whole new budget version in the project by copying the entire budget.
You are now ready to generate the first budget from the selected template:
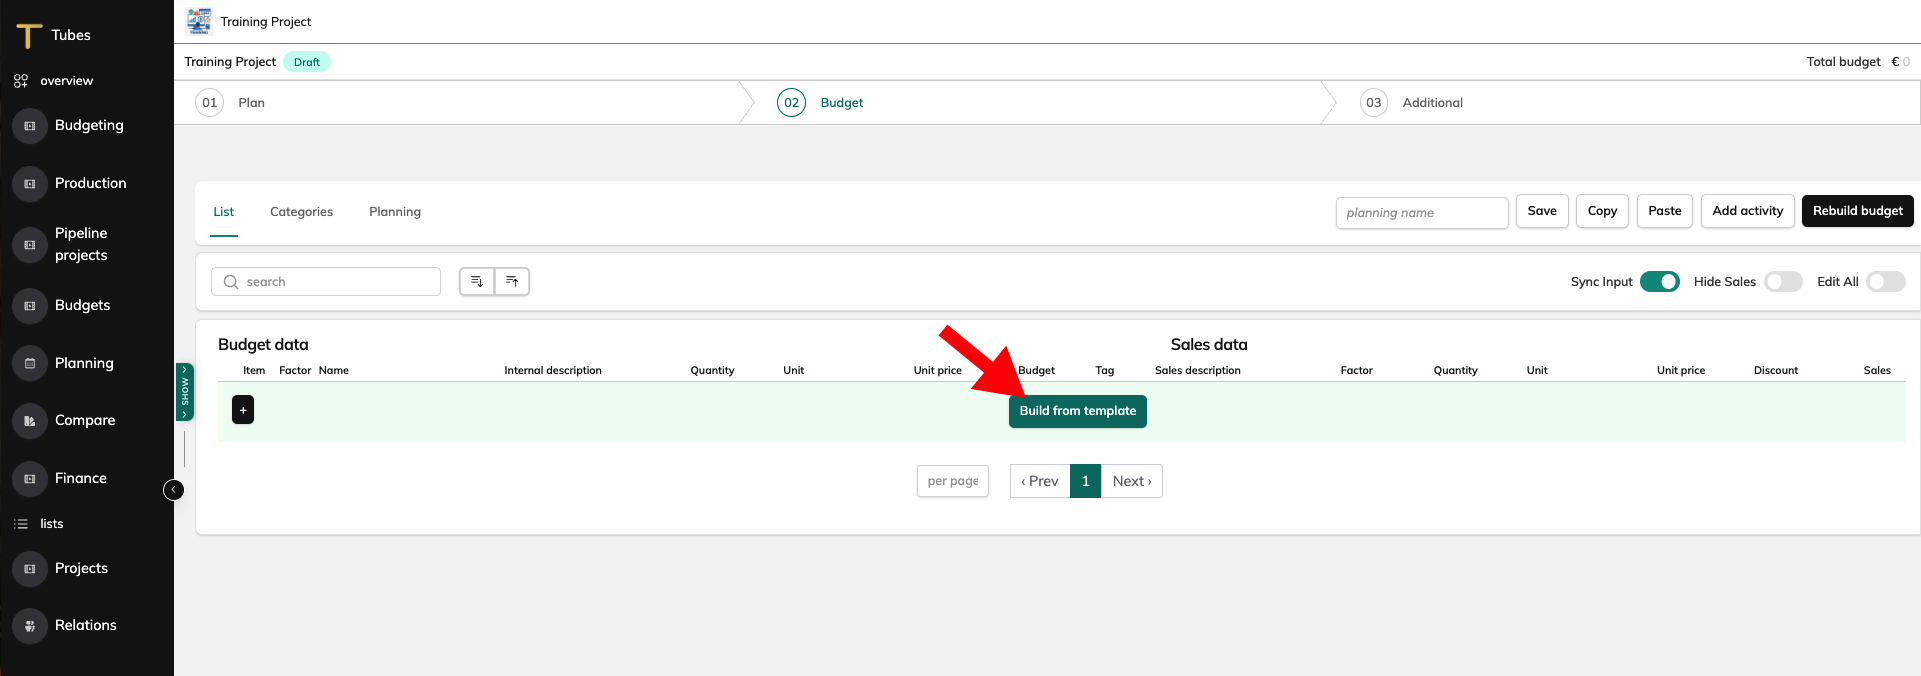
14. Based on the selected “Training Template”, you can build the budget.
To do this, click “Build from Template”. Once you click this button, the budget will automatically be generated from the selected template.
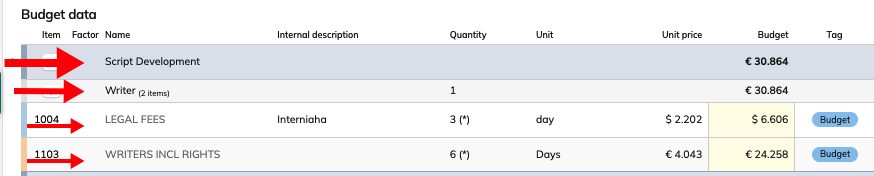
The budget is structured into two to three layers. → Build from a template is always tree layers
Activity
Resources under each activity (optional)
Budget item lines under each activity (and optional resource)
Building a budget from a template always creates three layers.
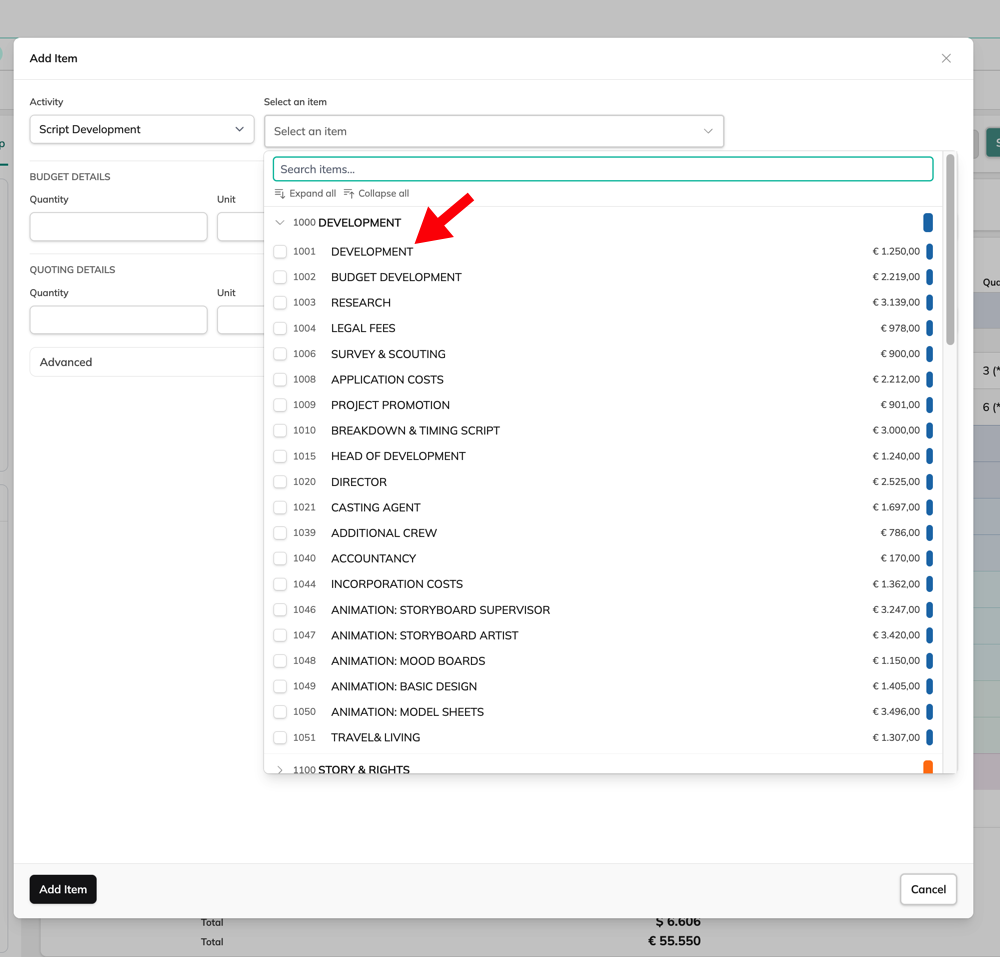
15. Add budgetlines manual. Click on the Plus in the category header
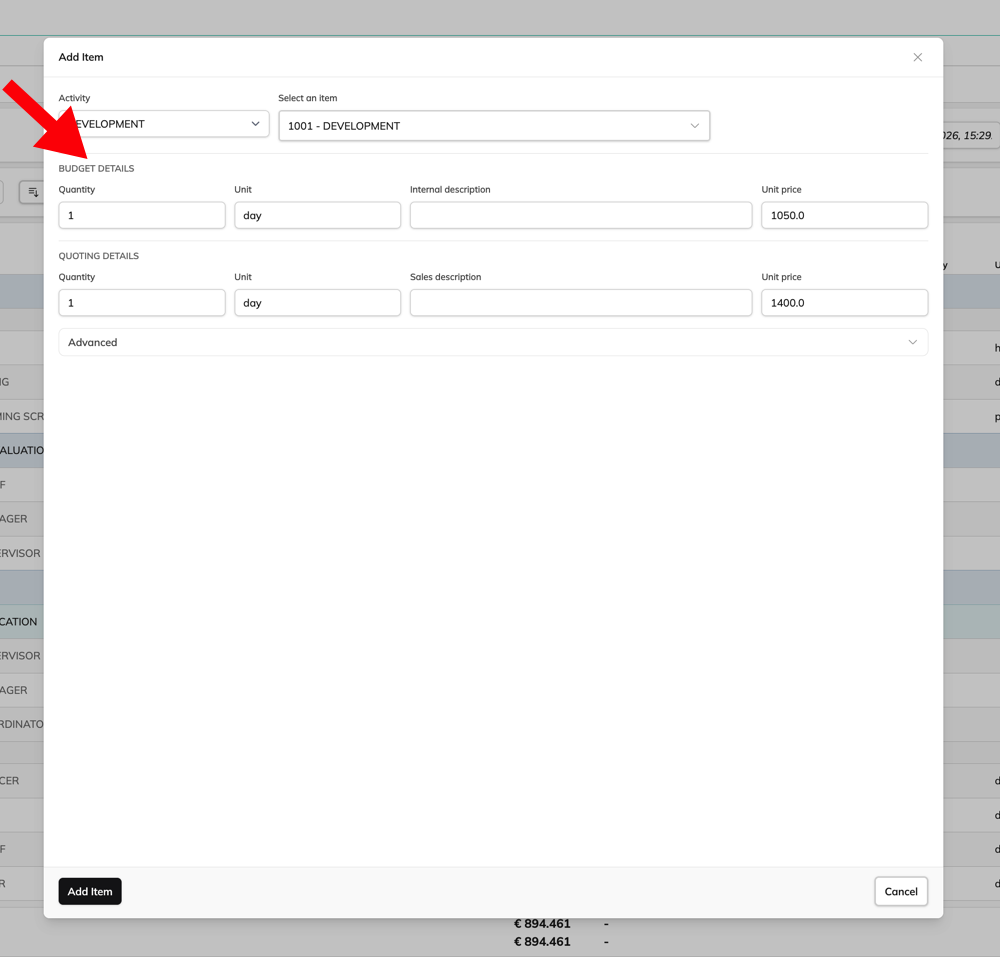
16. Now add one new budget line using the popover (A), then complete the budget details and, if needed, the sales data (B).
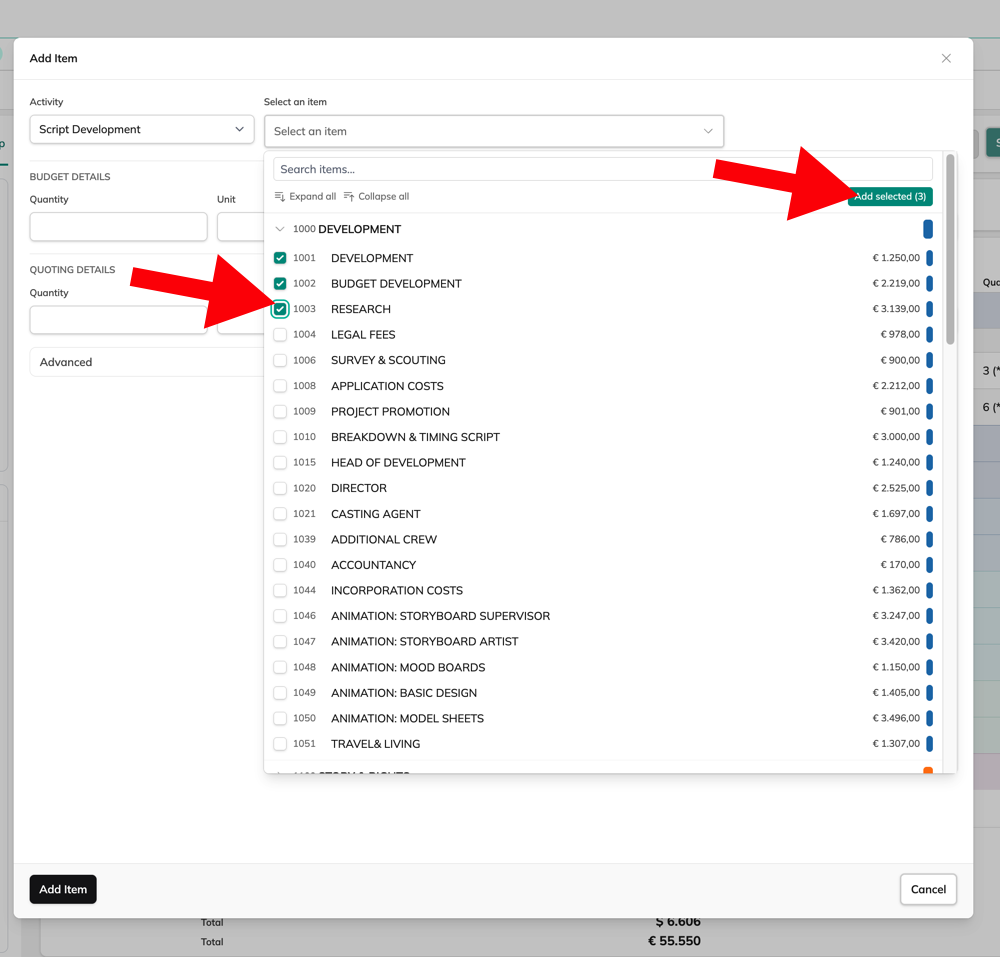
You can also add multiple items at once. To do this, open the same popover and select “Select an Item”. This time, select the items using the checkboxes on the left. Then click “Add selected”.
Individual items and resources can be removed in the List view using the pencil icon.
The trash icons will then become visible.
16. remove a budget line, using the pencil and trash icon.

A
B

Save versions of the budget
While setting up the budget, you regularly save a version. At the top of the menu, you can give the version a name and save it by clicking “Save”.
16. Click the menu on the left side of the budget and go to the “Save” tab. Here you will find all saved versions. From here, you can also reopen previous versions.

Open budget item details
Open the item detail screen by selecting one of the budget item lines and clicking on its name.
You will now see the detail screen displayed in a popover.
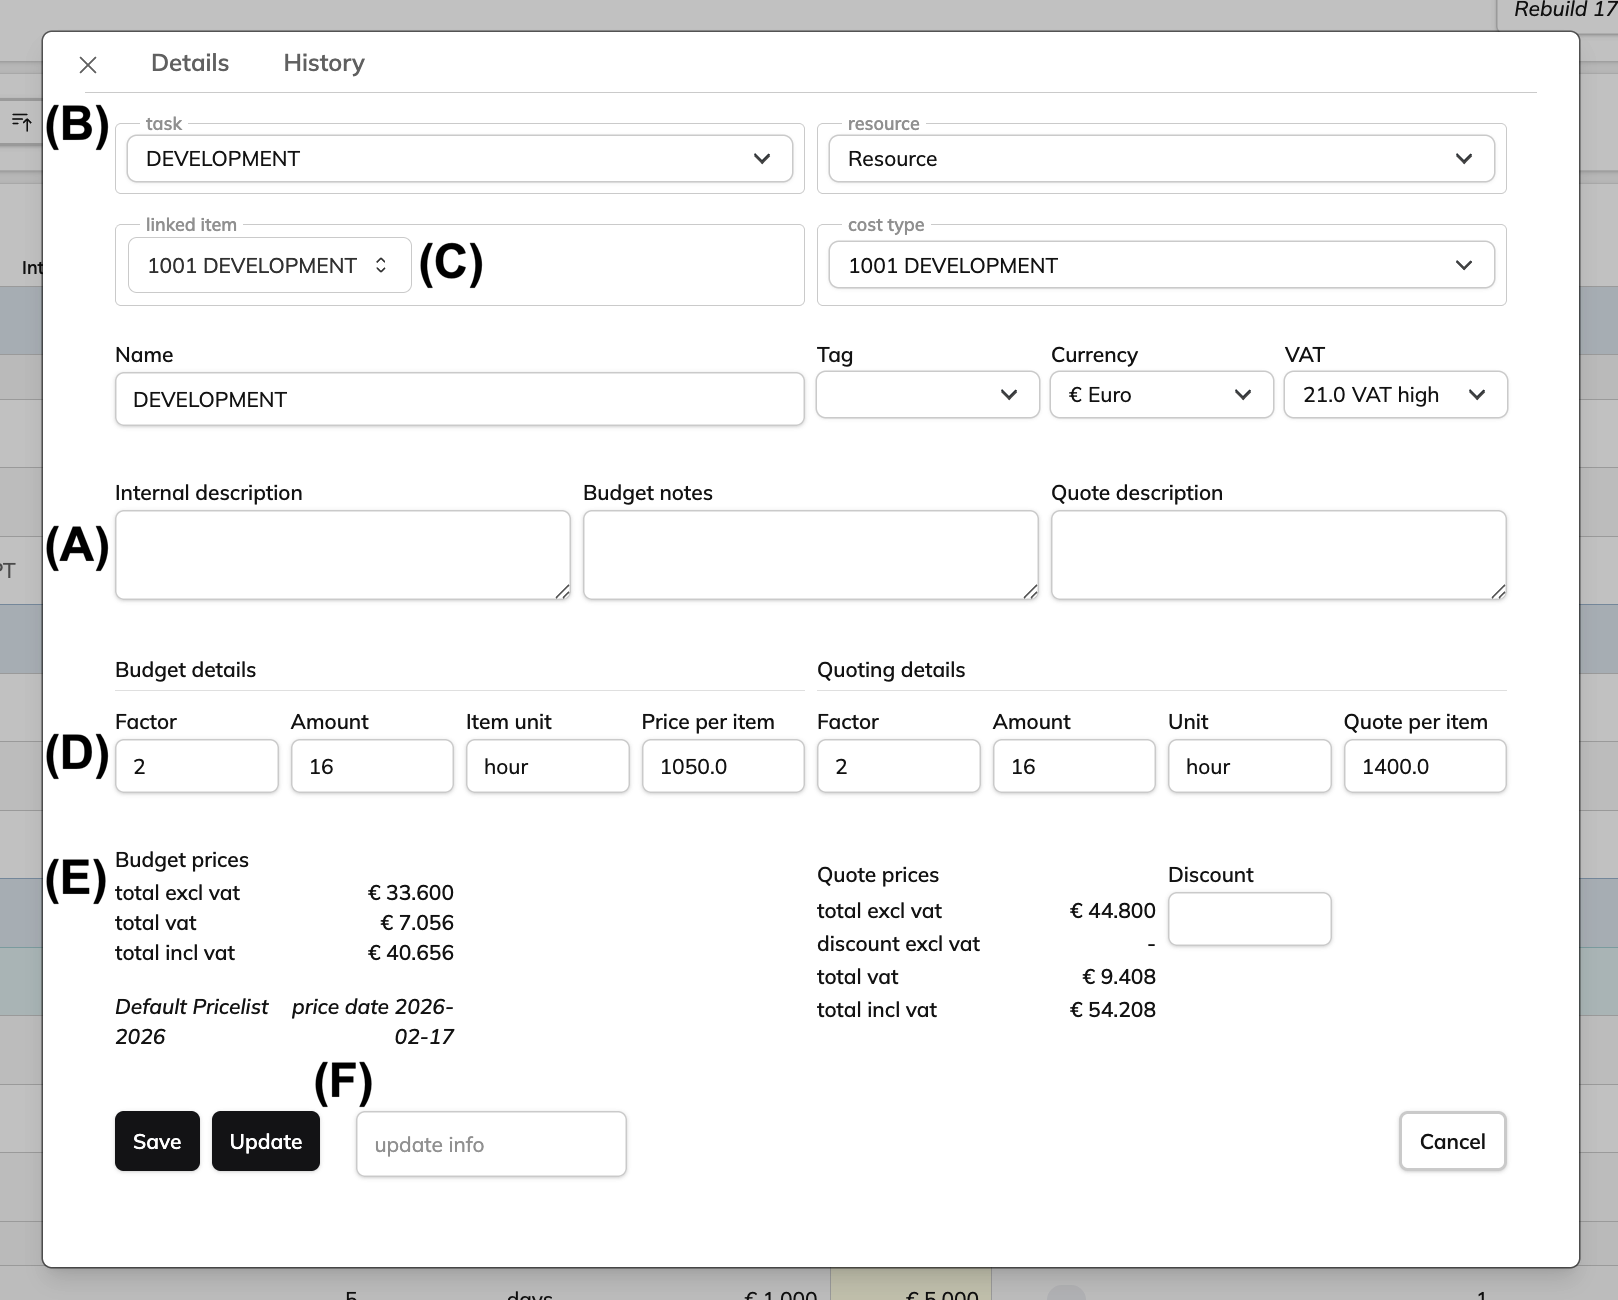
Here, you can add different types of comments to the item (A), move it to another Activity or Resource (B), link it to a different Cost Type (C), and adjust the price details and quantities (D).
At the bottom, the total prices are displayed (E).
If you enter text in the “Update info” field at the very bottom and click “Update”, you can later review what was changed under the “History” tab, based on your comment (F).
17. Open the budget details, check the task, add an internal description, and change the factor.
18. Give the budget a new name and save the budget
Additional costs
After setting up the budget you can add additional costs.
19. Navigate to the next step and click “Additional Costs”.
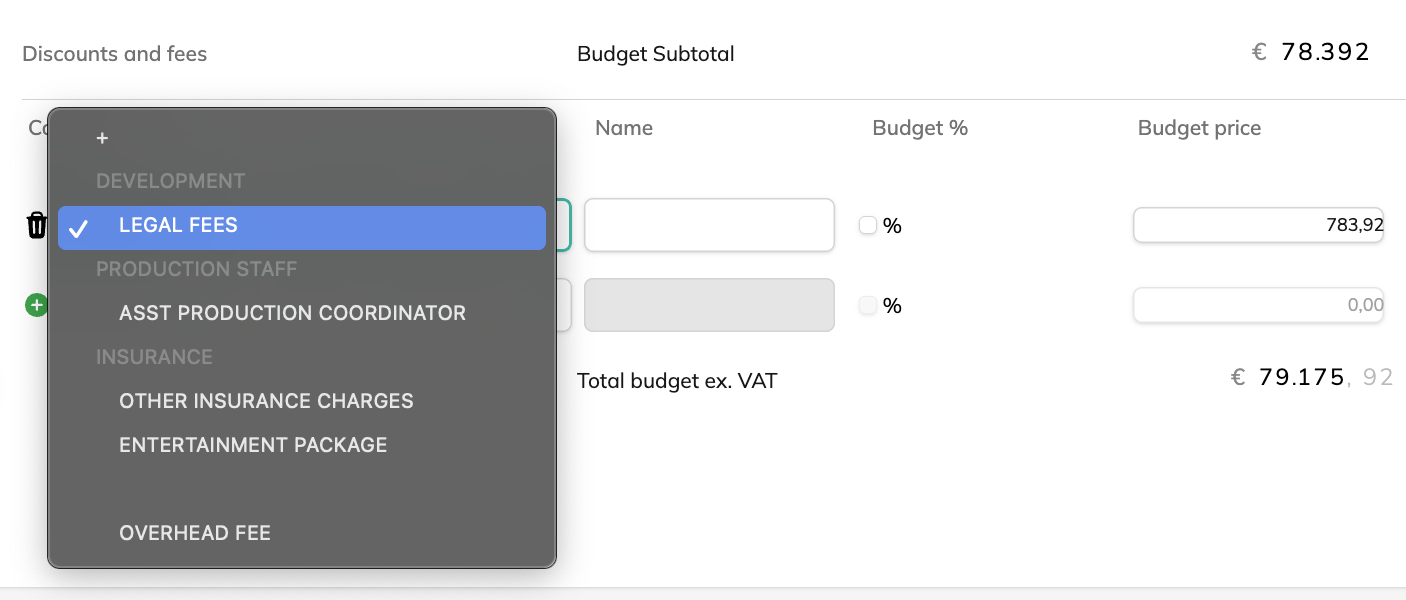
Additional costs are, for example, costs that you want to include in the proposal but that are not part of the production budget, such as fees or insurance costs.
They can also be costs that are calculated as a percentage of the total production budget and are therefore calculated after the production budget has been created.
20. Add a new additional cost item by selecting one from the list.
You will see the line being added.
You can adjust the amount or the budget percentage.
21. Check the checkbox for the field and enter 10 in the budget percentage field.
22. Click “Training Project” in the top-left corner to return to the project overview.